My Supplies
 Get Help
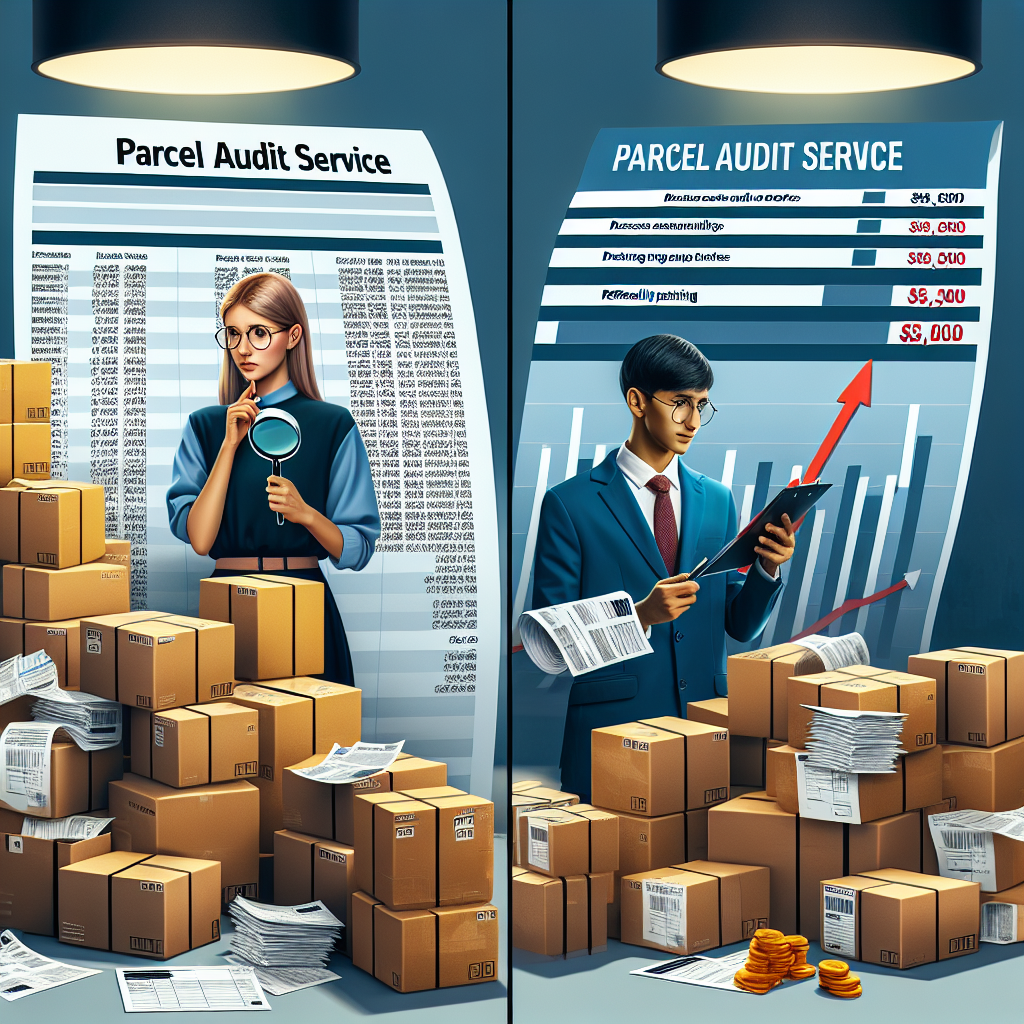
How Parcel Audit Services Reduce Shipping Costs and Errors
Understanding Parcel Audit Services
Imagine a bustling e-commerce company that ships thousands of packages daily. Now, picture them losing up to 20% of their shipping costs due to unnoticed billing errors. That’s not just a bad hair day; that’s a financial nightmare! This is where parcel audit services come into play, acting like a hawk eyeing every detail of your shipping invoices.
Parcel audit services are designed to scrutinize shipping bills and identify discrepancies that could lead to overpayments. They dig through the minutiae—like weight discrepancies, zone misclassifications, and accessorial charges—to ensure you’re only paying for what you should. Think of them as your financial detectives in the chaotic world of logistics.
The Mechanics Behind Parcel Audits
So how do these services actually work? It’s not just about checking boxes and crossing fingers. The process typically involves several key steps:
- Data Collection: Gather all relevant shipping invoices and records.
- Analysis: Use advanced analytics tools to compare billed amounts against agreed-upon rates.
- Discrepancy Identification: Spot any errors or charges that don’t align with the service level.
- Reporting: Generate detailed reports outlining findings and potential refunds.
- Claiming Refunds: Assist in filing claims for overcharges with carriers.
Key Insight: Businesses can recover significant amounts—often thousands of dollars—by utilizing parcel audit services effectively.
Real-World Impact
A mid-sized retail business once discovered they had been charged incorrectly for expedited shipping services they never requested. After employing parcel audit services, they reclaimed over ,000 in erroneous charges within just three months! This not only improved their bottom line but also shifted their focus back to growth rather than grappling with billing nightmares.
But it’s not just about recovering lost funds; it’s about preventing future mistakes. By establishing a consistent auditing process, businesses can fine-tune their shipping operations, negotiate better rates with carriers based on accurate data, and ultimately enhance customer satisfaction through timely deliveries.
Should You Consider Parcel Audit Services?
If your business relies heavily on shipping—be it an online store or a logistics provider—you might want to consider integrating parcel audit services into your operations. Look for providers who offer comprehensive analytics capabilities and have experience in your specific industry.
Imagine a bustling e-commerce company that ships thousands of packages daily. Now, picture them losing up to 20% of their shipping costs due to unnoticed billing errors. That’s not just a bad hair day; that’s a financial nightmare! This is where parcel audit services come into play, acting like a hawk eyeing every detail of your shipping invoices.
Parcel audit services are designed to scrutinize shipping bills and identify discrepancies that could lead to overpayments. They dig through the minutiae—like weight discrepancies, zone misclassifications, and accessorial charges—to ensure you’re only paying for what you should. Think of them as your financial detectives in the chaotic world of logistics.
The Mechanics Behind Parcel Audits
So how do these services actually work? It’s not just about checking boxes and crossing fingers. The process typically involves several key steps:
- Data Collection: Gather all relevant shipping invoices and records.
- Analysis: Use advanced analytics tools to compare billed amounts against agreed-upon rates.
- Discrepancy Identification: Spot any errors or charges that don’t align with the service level.
- Reporting: Generate detailed reports outlining findings and potential refunds.
- Claiming Refunds: Assist in filing claims for overcharges with carriers.
Key Insight: Businesses can recover significant amounts—often thousands of dollars—by utilizing parcel audit services effectively.
Real-World Impact
A mid-sized retail business once discovered they had been charged incorrectly for expedited shipping services they never requested. After employing parcel audit services, they reclaimed over $15,000 in erroneous charges within just three months! This not only improved their bottom line but also shifted their focus back to growth rather than grappling with billing nightmares.
But it’s not just about recovering lost funds; it’s about preventing future mistakes. By establishing a consistent auditing process, businesses can fine-tune their shipping operations, negotiate better rates with carriers based on accurate data, and ultimately enhance customer satisfaction through timely deliveries.
Should You Consider Parcel Audit Services?
If your business relies heavily on shipping—be it an online store or a logistics provider—you might want to consider integrating parcel audit services into your operations. Look for providers who offer comprehensive analytics capabilities and have experience in your specific industry.
Identifying Common Shipping Errors
Ever had that sinking feeling when you realize your shipping costs are spiraling out of control? You're not alone. A staggering 80% of businesses encounter billing errors in their shipping invoices, leading to a collective loss of billions each year. It's like throwing money out the window while hoping for a miracle.
From a small startup selling handmade crafts to a large-scale distributor, shipping errors can plague any business. Picture this: a local bakery that ships its delicious treats nationwide suddenly finds itself paying for oversized packages because the carrier misclassified their cookie boxes. Ouch! Those extra charges can add up faster than you can say freshly baked.
Common Types of Shipping Errors
- Weight Miscalculations: Packages often get charged based on dimensional weight rather than actual weight.
- Incorrect Zone Assignments: Deliveries to the wrong zones can incur higher fees.
- Accessorial Charges: Unexpected fees for services like liftgate delivery or residential delivery can sneak in.
- Duplicate Charges: Sometimes, invoices mistakenly list the same shipment multiple times.
- Service Level Discrepancies: Being billed for expedited shipping when only standard service was used.
These errors are not just minor annoyances; they can significantly impact your bottom line. For instance, consider a mid-sized apparel company that ships thousands of packages monthly. They might not notice that they’re consistently overcharged due to incorrect zone assignments—until it’s too late and their profit margins take a hit.
The Ripple Effect of Shipping Errors
But what’s the big deal? you might wonder. Well, shipping errors don’t just affect your finances; they also ripple through your entire operation. When costs rise unexpectedly, businesses may cut corners elsewhere—like skimping on packaging quality or delaying shipments—which can lead to unhappy customers and tarnished reputations.
Addressing these common errors with parcel audit services is essential to maintaining healthy cash flow and customer satisfaction.
So how do I spot these issues? Great question! Start by meticulously reviewing your shipping invoices against your agreements with carriers. Look for patterns in overcharges and discrepancies. This kind of proactive approach will not only help you identify problems sooner but also prepare you for discussions with parcel audit services if needed.
Remember, knowledge is power! By understanding common shipping errors, you'll be better equipped to tackle them head-on.
Cost Analysis of Shipping Errors
Shipping errors can be more than just a headache; they can wreak havoc on your bottom line. Did you know that businesses lose an estimated .5 billion annually due to billing mistakes in shipping invoices? That's a staggering figure that could fund a small startup or even a lavish vacation!
Consider the plight of a regional furniture retailer. They ship bulky items across the country, and their shipping costs are already sky-high. When they discovered that they were being charged for incorrect weights—thanks to dimensional weight pricing—they found themselves bleeding money. After digging into their shipping audit, they uncovered over ,000 in erroneous charges over just one year.
Breaking Down the Costs
To truly grasp the impact of shipping errors, let’s break down how these mistakes accumulate costs across various categories:
| Error Type | Potential Cost Impact |
|---|---|
| Weight Miscalculations | ,000 – ,000 annually |
| Incorrect Zone Assignments | ,000 – ,000 annually |
| Accessorial Charges | ,000 – ,000 annually |
| Duplicate Charges | ,500 – ,500 annually |
| Service Level Discrepancies | ,000 – ,000 annually |
Total potential losses can easily exceed ,000 per year for medium-sized businesses.
The Hidden Costs of Errors
But wait, you might say. Isn't it just about the money? Not quite! The ripple effects of these errors extend far beyond just financial losses.
Imagine this: your customer orders a beautiful dining table for their new home. Due to an error in shipping charges and delays caused by misclassifications, it arrives two weeks late and with extra delivery fees. That customer isn’t likely to come back for round two!
So what can businesses do? Implementing parcel audit services is like having an insurance policy against these costly blunders. They help identify discrepancies before they spiral out of control and ensure you're not paying for someone else's mistakes.
In the end, understanding the cost analysis of shipping errors isn't just about slashing expenses; it's about preserving your brand's integrity and ensuring customer satisfaction remains high.
Shipping errors can be more than just a headache; they can wreak havoc on your bottom line. Did you know that businesses lose an estimated $1.5 billion annually due to billing mistakes in shipping invoices? That's a staggering figure that could fund a small startup or even a lavish vacation!
Consider the plight of a regional furniture retailer. They ship bulky items across the country, and their shipping costs are already sky-high. When they discovered that they were being charged for incorrect weights—thanks to dimensional weight pricing—they found themselves bleeding money. After digging into their shipping audit, they uncovered over $30,000 in erroneous charges over just one year.
Breaking Down the Costs
To truly grasp the impact of shipping errors, let’s break down how these mistakes accumulate costs across various categories:
| Error Type | Potential Cost Impact |
|---|---|
| Weight Miscalculations | $5,000 – $15,000 annually |
| Incorrect Zone Assignments | $10,000 – $25,000 annually |
| Accessorial Charges | $2,000 – $8,000 annually |
| Duplicate Charges | $1,500 – $4,500 annually |
| Service Level Discrepancies | $3,000 – $10,000 annually |
Total potential losses can easily exceed $60,000 per year for medium-sized businesses.
The Hidden Costs of Errors
But wait, you might say. Isn't it just about the money? Not quite! The ripple effects of these errors extend far beyond just financial losses.
Imagine this: your customer orders a beautiful dining table for their new home. Due to an error in shipping charges and delays caused by misclassifications, it arrives two weeks late and with extra delivery fees. That customer isn’t likely to come back for round two!
So what can businesses do? Implementing parcel audit services is like having an insurance policy against these costly blunders. They help identify discrepancies before they spiral out of control and ensure you're not paying for someone else's mistakes.
In the end, understanding the cost analysis of shipping errors isn't just about slashing expenses; it's about preserving your brand's integrity and ensuring customer satisfaction remains high.
Mechanisms of Cost Reduction through Audits
Let’s get real: companies waste billions on shipping errors every year, and it’s not because they’re sending packages to Mars. A recent study found that nearly 80% of shipping invoices contain some form of error. That’s like finding a surprise fee on your favorite streaming service—nobody likes it, and it adds up fast!
Enter parcel audit services, the unsung heroes of the logistics world. These services don’t just comb through invoices; they employ sophisticated algorithms and analytics to unearth discrepancies that would make even the most seasoned accountant weep. Think of them as financial detectives equipped with magnifying glasses, ready to tackle those pesky overcharges.
How Parcel Audits Work Their Magic
The process begins with data collection—gathering all your shipping records like a meticulous librarian cataloging books. Next up is analysis, where advanced analytics tools kick in to compare billed amounts against your pre-negotiated rates. This is where the real magic happens: discrepancies are identified, from weight miscalculations to incorrect zone assignments.
- Data Collection: All relevant shipping invoices are gathered.
- Analysis: Advanced tools compare billed amounts against agreed rates.
- Discrepancy Identification: Errors and unjustified charges are spotted.
- Reporting: Detailed reports highlight findings and potential refunds.
- Claiming Refunds: Assistance in filing claims for overcharges.
Key Insight: Businesses leveraging parcel audit services can recover thousands in overcharges, often turning missed costs into unexpected profits.
The Ripple Effect of Savings
But what does this really mean for my business? you might ask. Well, let’s take a look at a mid-sized electronics retailer that ships products nationwide. After implementing parcel audit services, they discovered they were overcharged due to incorrect weight classifications on nearly half of their shipments. They recovered over ,000 in just six months! This wasn’t just about getting money back; it allowed them to reinvest in marketing and improve customer service.
Now this is where things break down, you might think—what about future errors? Regular audits don’t just recover lost funds; they create a feedback loop that helps businesses refine their shipping processes. With accurate data at hand, companies can negotiate better rates with carriers based on actual performance metrics rather than guesswork.
Why Wait? Start Auditing Today!
So what should you do next? If you’re not already using parcel audit services, consider adding them to your logistics strategy. Look for providers who offer comprehensive analytics capabilities tailored to your industry needs. Remember, every dollar saved is a dollar earned—and who doesn’t want a little extra cash flow?
Let’s get real: companies waste billions on shipping errors every year, and it’s not because they’re sending packages to Mars. A recent study found that nearly 80% of shipping invoices contain some form of error. That’s like finding a surprise fee on your favorite streaming service—nobody likes it, and it adds up fast!
Enter parcel audit services, the unsung heroes of the logistics world. These services don’t just comb through invoices; they employ sophisticated algorithms and analytics to unearth discrepancies that would make even the most seasoned accountant weep. Think of them as financial detectives equipped with magnifying glasses, ready to tackle those pesky overcharges.
How Parcel Audits Work Their Magic
The process begins with data collection—gathering all your shipping records like a meticulous librarian cataloging books. Next up is analysis, where advanced analytics tools kick in to compare billed amounts against your pre-negotiated rates. This is where the real magic happens: discrepancies are identified, from weight miscalculations to incorrect zone assignments.
- Data Collection: All relevant shipping invoices are gathered.
- Analysis: Advanced tools compare billed amounts against agreed rates.
- Discrepancy Identification: Errors and unjustified charges are spotted.
- Reporting: Detailed reports highlight findings and potential refunds.
- Claiming Refunds: Assistance in filing claims for overcharges.
Key Insight: Businesses leveraging parcel audit services can recover thousands in overcharges, often turning missed costs into unexpected profits.
The Ripple Effect of Savings
But what does this really mean for my business? you might ask. Well, let’s take a look at a mid-sized electronics retailer that ships products nationwide. After implementing parcel audit services, they discovered they were overcharged due to incorrect weight classifications on nearly half of their shipments. They recovered over $25,000 in just six months! This wasn’t just about getting money back; it allowed them to reinvest in marketing and improve customer service.
Now this is where things break down, you might think—what about future errors? Regular audits don’t just recover lost funds; they create a feedback loop that helps businesses refine their shipping processes. With accurate data at hand, companies can negotiate better rates with carriers based on actual performance metrics rather than guesswork.
Why Wait? Start Auditing Today!
So what should you do next? If you’re not already using parcel audit services, consider adding them to your logistics strategy. Look for providers who offer comprehensive analytics capabilities tailored to your industry needs. Remember, every dollar saved is a dollar earned—and who doesn’t want a little extra cash flow?
Enhancing Operational Efficiency with Parcel Audits
Imagine a logistics manager at a busy distribution center, drowning in a sea of shipping invoices, each one more confusing than the last. Now, picture that same manager discovering that their company lost ,000 last year due to unnoticed billing errors. That’s not just frustrating—it’s a wake-up call! Enter parcel audit services, the superheroes of shipping efficiency.
These services don’t just save money; they streamline operations in ways that ripple throughout your entire business. By meticulously analyzing shipping invoices and identifying discrepancies, parcel audits help businesses avoid unnecessary costs and improve overall efficiency. Think of them as the personal trainers for your shipping process—pushing you to get leaner and meaner while maximizing your performance.
The Operational Benefits of Parcel Audits
So what exactly do parcel audit services bring to the table? Here are some key operational benefits:
- Increased Accuracy: By regularly auditing invoices, businesses can ensure they’re only paying for what they should, reducing errors significantly.
- Enhanced Negotiation Power: With accurate data on past shipping costs and discrepancies, companies can negotiate better contracts with carriers.
- Streamlined Processes: Regular audits promote a culture of accountability and precision within logistics teams.
- Improved Customer Satisfaction: Accurate shipping practices lead to timely deliveries and fewer complaints.
Key Insight: Companies leveraging parcel audit services often report improved operational efficiency and reduced costs by up to 15% annually.
A Real-World Example
Let’s take a look at a hypothetical scenario involving a regional furniture retailer. After integrating parcel audit services into their operations, they identified that nearly 30% of their shipments were incorrectly billed due to weight miscalculations. By addressing these discrepancies through regular audits, they not only recovered over ,000 in erroneous charges but also optimized their shipping processes—reducing delivery times by an impressive 25%.
This is the power of operational efficiency through parcel audits. It’s not merely about reclaiming lost funds; it’s about creating a robust foundation for future growth. When businesses know exactly what they’re spending on shipping—and why—they can allocate resources more effectively across their operations.
As you reflect on your own operations, consider how much smoother things could run with the right auditing processes in place. Are you ready to take the plunge? Your bottom line will thank you!
Imagine a logistics manager at a busy distribution center, drowning in a sea of shipping invoices, each one more confusing than the last. Now, picture that same manager discovering that their company lost $50,000 last year due to unnoticed billing errors. That’s not just frustrating—it’s a wake-up call! Enter parcel audit services, the superheroes of shipping efficiency.
These services don’t just save money; they streamline operations in ways that ripple throughout your entire business. By meticulously analyzing shipping invoices and identifying discrepancies, parcel audits help businesses avoid unnecessary costs and improve overall efficiency. Think of them as the personal trainers for your shipping process—pushing you to get leaner and meaner while maximizing your performance.
The Operational Benefits of Parcel Audits
So what exactly do parcel audit services bring to the table? Here are some key operational benefits:
- Increased Accuracy: By regularly auditing invoices, businesses can ensure they’re only paying for what they should, reducing errors significantly.
- Enhanced Negotiation Power: With accurate data on past shipping costs and discrepancies, companies can negotiate better contracts with carriers.
- Streamlined Processes: Regular audits promote a culture of accountability and precision within logistics teams.
- Improved Customer Satisfaction: Accurate shipping practices lead to timely deliveries and fewer complaints.
Key Insight: Companies leveraging parcel audit services often report improved operational efficiency and reduced costs by up to 15% annually.
A Real-World Example
Let’s take a look at a hypothetical scenario involving a regional furniture retailer. After integrating parcel audit services into their operations, they identified that nearly 30% of their shipments were incorrectly billed due to weight miscalculations. By addressing these discrepancies through regular audits, they not only recovered over $20,000 in erroneous charges but also optimized their shipping processes—reducing delivery times by an impressive 25%.
This is the power of operational efficiency through parcel audits. It’s not merely about reclaiming lost funds; it’s about creating a robust foundation for future growth. When businesses know exactly what they’re spending on shipping—and why—they can allocate resources more effectively across their operations.
As you reflect on your own operations, consider how much smoother things could run with the right auditing processes in place. Are you ready to take the plunge? Your bottom line will thank you!
Leveraging Technology for Effective Auditing
Imagine a logistics manager sifting through hundreds of shipping invoices, each one riddled with potential errors. Now, what if I told you that leveraging technology can turn that daunting task into a streamlined process? It’s not magic; it’s just smart auditing.
Recent studies show that companies using advanced parcel audit services can recover up to 20% of their shipping costs. That’s not pocket change; that’s a significant boost to your bottom line! So, how exactly does technology play a role in this?
The Role of Advanced Analytics
At the heart of effective parcel audit services lies advanced analytics. These tools analyze vast amounts of data to uncover discrepancies that would be nearly impossible to spot manually. For instance, consider a mid-sized electronics retailer whose shipping invoices were consistently inflated due to incorrect weight classifications. By employing data analytics, they identified these errors and reclaimed over ,000 in just six months.
Advanced analytics don’t just help identify past mistakes; they also provide insights for future improvements. Businesses can track patterns in their shipping costs and make informed decisions about carrier negotiations and operational changes.
Automated Invoice Processing
Gone are the days of manual invoice processing—thankfully! Automated systems now allow businesses to upload shipping invoices directly into an auditing platform, where algorithms quickly analyze them for errors. This not only saves time but significantly reduces the risk of human error.
Automation is not just about speed; it’s about accuracy and efficiency.
Take a local bakery that ships nationwide: after implementing automated invoice processing, they discovered they were overcharged for oversized package fees due to misclassifications. With rapid identification of these issues, they saved thousands within months!
Real-Time Monitoring and Alerts
Real-time monitoring is like having a financial watchdog on duty 24/7. As soon as an anomaly is detected—be it an unexpected charge or an incorrect billing rate—alerts are sent out immediately. This proactive approach allows businesses to address issues before they escalate into costly mistakes.
Consider a regional furniture retailer: with real-time monitoring in place, they were alerted when one shipment was incorrectly billed for expedited delivery charges despite opting for standard service. Thanks to quick action, they avoided unnecessary costs and improved their overall operational efficiency.
So what’s the takeaway? Embracing technology in your auditing processes isn’t just smart; it’s essential for modern businesses looking to reduce costs and enhance efficiency. If you’re still relying on outdated methods, it might be time for an upgrade!
Imagine a logistics manager sifting through hundreds of shipping invoices, each one riddled with potential errors. Now, what if I told you that leveraging technology can turn that daunting task into a streamlined process? It’s not magic; it’s just smart auditing.
Recent studies show that companies using advanced parcel audit services can recover up to 20% of their shipping costs. That’s not pocket change; that’s a significant boost to your bottom line! So, how exactly does technology play a role in this?
The Role of Advanced Analytics
At the heart of effective parcel audit services lies advanced analytics. These tools analyze vast amounts of data to uncover discrepancies that would be nearly impossible to spot manually. For instance, consider a mid-sized electronics retailer whose shipping invoices were consistently inflated due to incorrect weight classifications. By employing data analytics, they identified these errors and reclaimed over $25,000 in just six months.
Advanced analytics don’t just help identify past mistakes; they also provide insights for future improvements. Businesses can track patterns in their shipping costs and make informed decisions about carrier negotiations and operational changes.
Automated Invoice Processing
Gone are the days of manual invoice processing—thankfully! Automated systems now allow businesses to upload shipping invoices directly into an auditing platform, where algorithms quickly analyze them for errors. This not only saves time but significantly reduces the risk of human error.
Automation is not just about speed; it’s about accuracy and efficiency.
Take a local bakery that ships nationwide: after implementing automated invoice processing, they discovered they were overcharged for oversized package fees due to misclassifications. With rapid identification of these issues, they saved thousands within months!
Real-Time Monitoring and Alerts
Real-time monitoring is like having a financial watchdog on duty 24/7. As soon as an anomaly is detected—be it an unexpected charge or an incorrect billing rate—alerts are sent out immediately. This proactive approach allows businesses to address issues before they escalate into costly mistakes.
Consider a regional furniture retailer: with real-time monitoring in place, they were alerted when one shipment was incorrectly billed for expedited delivery charges despite opting for standard service. Thanks to quick action, they avoided unnecessary costs and improved their overall operational efficiency.
So what’s the takeaway? Embracing technology in your auditing processes isn’t just smart; it’s essential for modern businesses looking to reduce costs and enhance efficiency. If you’re still relying on outdated methods, it might be time for an upgrade!
Supplier Diversity and Compliance Considerations
Let’s face it: supplier diversity isn’t just a trendy buzzword; it’s a game changer. Companies that actively engage diverse suppliers can increase their innovation potential by up to 20%. This isn’t just about checking boxes; it’s about unlocking new opportunities and driving growth.
For businesses leveraging parcel audit services, the intersection of supplier diversity and compliance is critical. Consider a mid-sized tech firm that prides itself on its commitment to diversity. They’ve set a goal to source at least 30% of their supplies from minority-owned businesses, but without the right auditing practices in place, they risk falling short of compliance requirements and missing out on potential contracts.
Navigating Compliance Challenges
The world of compliance can feel like navigating a maze blindfolded. There are federal regulations, state mandates, and industry standards that all come into play when it comes to supplier diversity. A common pitfall? Businesses often overlook the need for rigorous tracking of their spending with diverse suppliers, which can lead to non-compliance and penalties.
Imagine a logistics company that uses parcel audit services but fails to track their diverse supplier spending accurately. They might think they’re meeting their diversity goals until an audit reveals they’ve only allocated 15% of their budget towards minority-owned suppliers. Oops! Not only does this jeopardize their reputation, but it could also impact future contracts with government entities or larger partners who prioritize diversity.
The Role of Parcel Audit Services in Supplier Diversity
Here’s where parcel audit services come into play as your trusty sidekick in the fight for compliance. By meticulously analyzing shipping invoices and supplier data, these services can help businesses ensure they’re not just meeting but exceeding their diversity targets.
- Track spending with diverse suppliers accurately.
- Identify areas where more diverse sourcing is needed.
- Generate reports for stakeholders showcasing compliance efforts.
- Enhance negotiation power by demonstrating commitment to diversity.
Key Insight: Businesses that actively manage supplier diversity programs often see improved relationships with both customers and partners.
Now let’s be real: implementing these practices isn’t always smooth sailing. It requires commitment from leadership down through every department. But when done right, the benefits are substantial—not just in terms of compliance but also in fostering innovation and community growth.
Evaluating the ROI of Parcel Audit Services
A logistics manager at a mid-sized e-commerce company recently had a lightbulb moment: after implementing parcel audit services, they discovered they were overpaying by nearly ,000 annually due to unnoticed billing discrepancies. That’s not just a savings; it’s a whole new budget for a marketing campaign!
Evaluating the ROI of parcel audit services isn't just about crunching numbers; it's about understanding how these services can transform your shipping strategy from a financial black hole into a profit-generating machine. Let’s break down how to assess this return on investment.
Calculating Direct Savings
First off, let’s talk hard numbers. When you engage parcel audit services, the primary goal is to recover lost funds from billing errors. This includes things like weight miscalculations and incorrect zone assignments. For instance, consider a regional furniture retailer that utilized these services and uncovered over ,000 in erroneous charges within just one year. That’s cash back in their pocket and an immediate ROI!
Beyond Immediate Savings
But wait—there's more! The benefits of parcel audit services extend beyond immediate financial recovery. They also lead to improved operational efficiency and better decision-making. Take our e-commerce manager again: after realizing their shipping costs were out of control, they not only reclaimed funds but also renegotiated contracts with carriers based on accurate data, leading to an additional 10% reduction in shipping costs annually.
- Enhanced negotiation power with carriers.
- Improved accuracy in future shipping estimates.
- Streamlined logistics processes reducing manual errors.
Long-Term Strategic Benefits
What about the long-term benefits? you might ask. Well, regular audits create a feedback loop that helps companies refine their shipping strategies continuously. By establishing best practices based on data-driven insights, businesses can prevent future mistakes that could cost them dearly.
Companies leveraging parcel audit services report an average annual reduction in shipping costs by up to 10-15%.
A logistics manager at a mid-sized e-commerce company recently had a lightbulb moment: after implementing parcel audit services, they discovered they were overpaying by nearly $40,000 annually due to unnoticed billing discrepancies. That’s not just a savings; it’s a whole new budget for a marketing campaign!
Evaluating the ROI of parcel audit services isn't just about crunching numbers; it's about understanding how these services can transform your shipping strategy from a financial black hole into a profit-generating machine. Let’s break down how to assess this return on investment.
Calculating Direct Savings
First off, let’s talk hard numbers. When you engage parcel audit services, the primary goal is to recover lost funds from billing errors. This includes things like weight miscalculations and incorrect zone assignments. For instance, consider a regional furniture retailer that utilized these services and uncovered over $30,000 in erroneous charges within just one year. That’s cash back in their pocket and an immediate ROI!
Beyond Immediate Savings
But wait—there's more! The benefits of parcel audit services extend beyond immediate financial recovery. They also lead to improved operational efficiency and better decision-making. Take our e-commerce manager again: after realizing their shipping costs were out of control, they not only reclaimed funds but also renegotiated contracts with carriers based on accurate data, leading to an additional 10% reduction in shipping costs annually.
- Enhanced negotiation power with carriers.
- Improved accuracy in future shipping estimates.
- Streamlined logistics processes reducing manual errors.
Long-Term Strategic Benefits
What about the long-term benefits? you might ask. Well, regular audits create a feedback loop that helps companies refine their shipping strategies continuously. By establishing best practices based on data-driven insights, businesses can prevent future mistakes that could cost them dearly.
Companies leveraging parcel audit services report an average annual reduction in shipping costs by up to 10-15%.
{
“@context”: “https://schema.org”,
“@graph”: [
{
“@type”: “BlogPosting”,
“headline”: “How Parcel Audit Services Reduce Shipping Costs and Errors”,
“author”: {
“@type”: “Person”,
“name”: “Elisa”
},
“publisher”: {
“@type”: “Organization”,
“name”: “Hubzone Depot Shop”
},
“url”: “https://shop.hubzonedepot.com/how-parcel-audit-services-reduce-costs-errors”,
“mainEntityOfPage”: {
“@type”: “WebPage”,
“@id”: “https://shop.hubzonedepot.com/how-parcel-audit-services-reduce-costs-errors”
},
“description”: “Discover how parcel audit services streamline shipping, reduce costs, and minimize errors. Boost your logistics efficiency today!”,
“articleBody”: “
How Parcel Audit Services Reduce Shipping Costs and Errors
Understanding Parcel Audit Services
Imagine a bustling e-commerce company that ships thousands of packages daily…
“,
“datePublished”: “”,
“dateModified”: “”,
“speakable”: {
“@type”: “SpeakableSpecification”,
“xpath”: [
“/html/head/title”,
“/html/head/meta[@name=’description’]/@content”
]
}
},
{
“@type”: “FAQPage”,
“@id”: “#faq”,
“mainEntity”: [
{
“@type”: “Question”,
“name”: “What are parcel audit services?”,
“acceptedAnswer”: {
“@type”: “Answer”,
“text”: “
Parcel audit services are designed to scrutinize shipping bills and identify discrepancies that could lead to overpayments…
”
}
},
{
“@type”: “Question”,
“name”: “How do parcel audits work?”,
“acceptedAnswer”: {
“@type”: “Answer”,
“text”: “
- Data Collection: Gather all relevant shipping invoices and records…
”
}
},
{
“@type”: “Question”,
“name”:”What are common types of shipping errors?”,
“acceptedAnswer”:{
“@type”:”Answer”,
“text”:”
- Weight Miscalculations: Packages often get charged based on dimensional weight rather than actual weight…
”
}
}
]
}
]
}article blockquote,article ol li,article p,article ul li{font-family:inherit;font-size:18px}.featuredimage{height:300px;overflow:hidden;position:relative;margin-top:20px;margin-bottom:20px}.featuredimage img{width:100%;height:100%;top:50%;left:50%;object-fit:cover;position:absolute;transform:translate(-50%,-50%)}article p{line-height:30px}article ol li,article ul li{line-height:30px;margin-bottom:15px}article blockquote{border-left:4px solid #ccc;font-style:italic;background-color:#f8f9fa;padding:20px;border-radius:5px;margin:15px 10px}article div.info-box{background-color:#fff9db;padding:20px;border-radius:5px;margin:15px 0;border:1px solid #efe496}article table{margin:15px 0;padding:10px;border:1px solid #ccc}article div.info-box p{margin-bottom:0;margin-top:0}article span.highlight{background-color:#f8f9fb;padding:2px 5px;border-radius:5px}article div.info-box span.highlight{background:0 0!important;padding:0;border-radius:0}article img{max-width:100%;margin:20px 0}