

 My Supplies
 Get Help
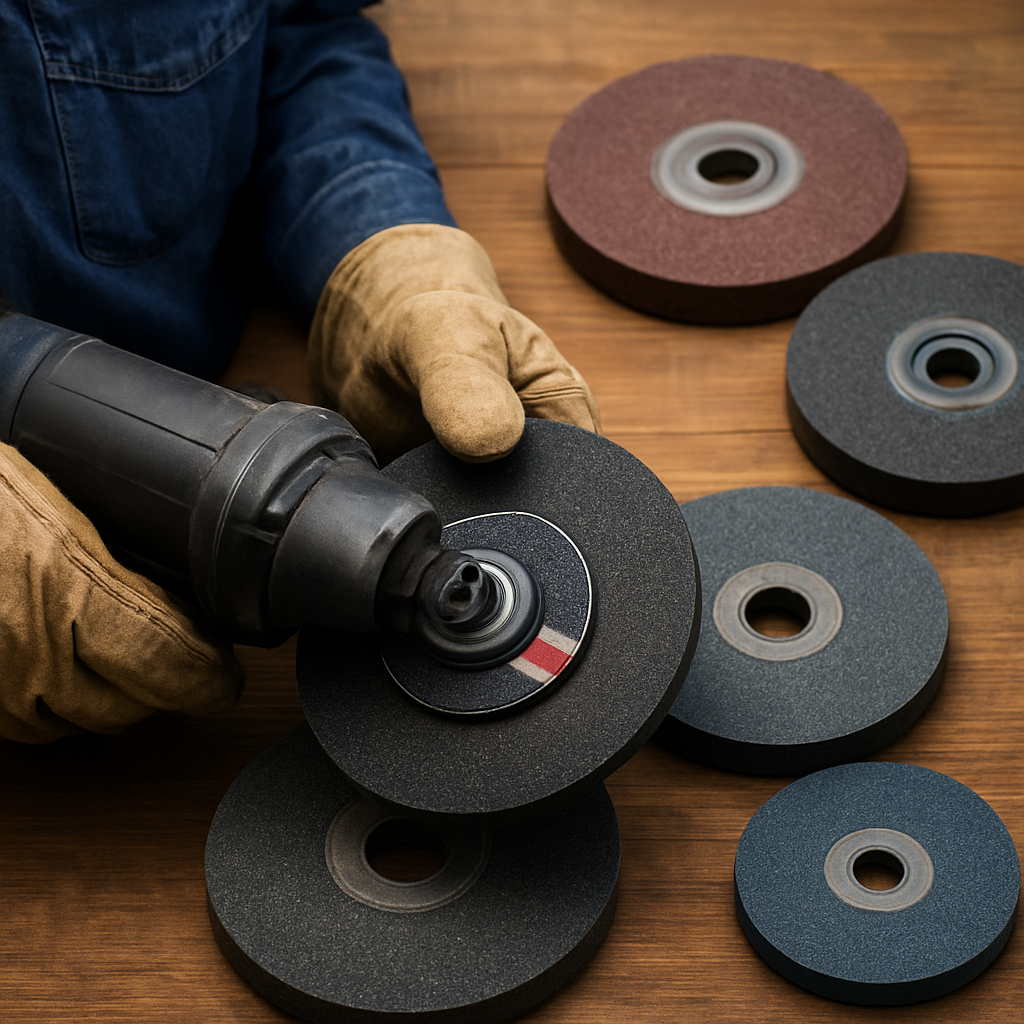
Choosing the wrong grinding wheels costs time, money, and operator safety. This contractor focused buyer's guide shows how to match abrasive type, grit, bond, and wheel form to the material and task, verify RPM and arbor compatibility, and follow the inspection and mounting steps required by OSHA and ANSI. It also lays out simple cost per job math, procurement specs, and how to include HUBZone and supplier diversity requirements so your purchases survive inspections and keep crews working.
Match wheel type to material and task
Start with wheel form, not brand. Pick the wheel shape that solves the task first – heavy stock removal, beveling, cutoff, profile blending, or precision finishing – then match abrasive grain and bond. Form dictates contact area, heat generation, and operator technique; ignoring it is the most common real-world mistake that drives rework and extra changeovers.
Match forms to jobs
Practical mapping: bench grinder wheels for toolroom sharpening and deburring, cup grinder wheels for surface flattening or mortar removal, thin cutting discs for cutoff, angle grinder wheels and flap discs for weld cleanup and profile work, and diamond grinding wheels for hard masonry, tile, and carbide. Each form transfers heat differently and requires a bond that prevents glazing or loading for that use case.
- Mild and structural steel: use aluminum oxide grinding wheels or zirconia alumina for faster removal on thicker sections
- Stainless and high alloy steel: pick ceramic alumina or zirconia alumina to resist heat and preserve edge and metallurgy
- Nonferrous metals and painted surfaces: use silicon carbide or non-loading resinoid discs to avoid clogging
- Masonry, stone, tile: choose diamond grinding wheels or bonded silicon carbide designed for abrasive cutting
- Finishing and blending: flap discs or polishing discs with finer grit 80-120 for consistent surface finish
Tradeoff to accept: more aggressive grains like zirconia or ceramic cut faster and last longer on hard jobs but cost more up front and require compatible bonds and cooler cutting technique to avoid burning thin sections. Cheaper aluminum oxide wheels are fine for occasional use but inflate labor cost when used as a daily production wheel.
Concrete example: a metal fabrication crew moved from 36 grit aluminum oxide bench discs to 24 grit zirconia alumina flap discs for daily weld grind-downs on A36 plates. Result: fewer wheel changes, 30 to 40 percent faster cycle time per weld, and visibly less wheel loading. The crew accepted a higher unit price because labor savings and reduced downtime paid the difference within a week on recurring work.
Compatibility note: thin cutting discs and reinforced resinoid wheels need verified RPM, correct flange spacing, and the right guard. Always match the wheel maximum RPM to the tool nameplate and confirm arbor size before selecting a cutting disc for an angle grinder – misfit is a safety and compliance failure under OSHA abrasive wheel rules.
Key point: match wheel form to task first, then choose abrasive grain and bond to control heat, loading, and lifecycle cost.
Understand grit, grade, and bond and how they affect performance
Grit, grade, and bond are not independent choices—they are a system. Change one and the others must compensate. In practice that means the wheel you pick determines how fast you remove metal, how the surface looks afterwards, how much heat you generate, and how often crews stop to change wheels.
Grit controls the cut pattern and speed. Coarser grit bites aggressively and moves stock quickly but leaves a pronounced scratch pattern and higher local heat. Finer grit smooths that pattern and reduces finish work, but you pay with slower removal and shorter life per cut when used for heavy grinding. Choose grit to match the operation you actually need, not the one you hope to do later.
Grade (hardness) behaves counterintuitively. Harder bonds keep a wheel's profile longer on soft, gummy materials; softer bonds release worn grains faster on hard alloys so fresh cutting edges expose. Many crews assume harder is always better—this leads to glazing, increased wheel loading, and reduced life on tough alloys.
Bond type sets the wheel's toughness and heat response. Vitrified bonds give precision and run cooler but are brittle and poor for impact or handheld high‑speed use. Resin or reinforced resin bonds tolerate shock and high RPMs, which is why cutting discs and thin bench wheels use them. The tradeoff: resin bonds can clog more and may need dressing or anti‑loading measures for nonferrous work.
How these variables interact in real work
Practical rule: for heavy removal pick a coarse abrasive in a tougher bond; for finish work pick a finer abrasive and a bond that preserves shape. If you move from flat bench work to angle grinder work, reassess bond toughness and wheel reinforcement—what works on a stationary grinder often fails on a handheld tool.
Concrete example: a facilities crew switching from a generic shop disc to a purpose-built ceramic flap disc for stainless handrail cleanup found fewer burn marks and less rework. The new wheel released dull grains sooner, keeping cutting action cooler and saving the team from replacing warped sections later.
Limitation to watch: specialty abrasives that cut fast and last long cost more per wheel and can tempt buyers to overuse them on thin sections. They can remove material so quickly you overheat or gouge parts. Buy for the job mix on your calendar and train operators on pressure and technique, not just the wheel spec.
For technical selection guides and manufacturer comparisons consult resources like Norton Abrasives and test a matched pair—a removal wheel and a finishing wheel—on representative material before standardizing across crews.
Verify grinder compatibility: RPM, arbor, and machine class
Key point: compatibility failures are a common source of wheel breakage and wasted shifts. Focus on three distinct checks before you buy or mount a wheel: the wheel speed rating, the bore and flange interface, and whether the wheel is built for the machine class you will use it on.
Read the markings and match the tool
Wheels are stamped with several critical values – diameter, maximum surface speed or RPM, abrasive type, bond, grit, and reinforcement. Compare the stamped maximum RPM against the tool nameplate RPM. If the wheel rating is lower than the tool speed, the match is invalid. Also confirm the abrasive type and bond match the intended application before checking mechanical fit.
- Bore and arbor fit: confirm the wheel bore equals the arbor diameter or use the correct adapter supplied by the wheel maker; common portable tool arbors include 5/8 inch and 7/8 inch but measure to be sure
- Flange seating and thickness: thin cutting discs need full backer support and specific flanges; a mismatch causes eccentric loading and early failure
- Machine class: bench grinders, angle grinders, die grinders, and stationary surface grinders impose different shock and speed demands – do not substitute a stationary wheel on a handheld high speed tool
- Reinforcement rating: reinforced resin or fiberglass layers are required for thin cutoff wheels and some high speed discs – verify the reinforcement symbol on the stamp
Tradeoff to accept: wheels rated for higher RPM and reinforced designs increase safety margin but cost more and may be heavier or slower to install. For crews that use grinders across multiple machines, standardize on wheels rated for the highest tool RPM you run regularly to avoid tool specific inventory, but expect a unit price premium.
Practical limitation: die grinders often exceed 20,000 RPM and require purpose built consumables. Do not try to adapt cutoff wheels or bench wheels for die grinder use. The wrong wheel at elevated speed can fail without visible pre fault signs.
Concrete example: A maintenance crew was chasing vibration on an angle grinder. The root cause was a 3 mm cutting disc mounted with an adaptor that left the wheel cantilevered on the flange. Replacing the disc with a properly bored, reinforced disc and the correct flange removed the vibration and stopped rapid wheel wear. The fix cost less than a single lost shift.
Critical: verify wheel RPM rating exceeds tool RPM and confirm bore, flange, and reinforcement before mounting. For regulatory guidance see OSHA abrasive wheel rules and ANSI B7.1.
Safety, inspection, mounting, storage, and disposal procedures
Hard fact: most wheel failures are preventable and come from poor inspection or bad mounting, not manufacturing defects. A consistent pre use routine reduces catastrophic breakage, minimizes downtime, and keeps crews compliant with OSHA abrasive wheel rules and industry practice.
Daily and pre use inspection
Visual and tactile checks first. Look for hairline fissures, chips at the working surface, glaze, or evidence of overheating. Do not mount if you see any irregular fracture lines running from inner bore outward. On vitrified wheels a tiny chip in the center is a discard condition; on some resin bonded discs an isolated peripheral nick might be tolerable if outside the contact area, but document the decision.
Tap test and alternate checks. Perform a light tap test by holding the wheel on the arbor hole and striking with a nonmetallic mallet for a clear ringing tone versus a dull thud. If ambient noise prevents a reliable tap test, run a short guarded spin at low speed and inspect for wobble or vibration. Measure bore runout with calipers if the wheel has a history of vibration.
Mounting, spin testing, and on the tool
- Prepare flanges: clean mating surfaces and remove burrs; use manufacturer specified flanges and do not mix tapered and flat designs.
- Seat, do not crush: tighten nuts to seat the wheel squarely but avoid over torque that can crack vitrified wheels; hand torque then follow tool maker guidance.
- Guarded spin test: after mounting, run the tool in a guarded area for one minute at operating speed to confirm stability before use.
- Record install: log wheel ID, install date, operator, and machine in a maintenance record for traceability and life tracking.
Practical limitation: in field jobs perfect storage and climate control are rare. Accept that wheels stored overnight on a truck can pick up moisture or knocks. Mitigate by keeping a small working stock on site in protective cases and rotating stock back to a dry shop overnight.
Concrete example: a shop foreman photographed and logged a small off center fracture found during the tap test, removed the wheel, and ran the job with a spare. During the guarded spin test the spare developed imbalance from a cracked flange adapter. Because both wheels had been recorded, the incident was traceable and prevented a field failure that would have cost a shift and risked injury.
Disposal and end of life. Retire wheels that are below minimum diameter, have structural damage, or show repeated glazing that cannot be dressed. Mark retired wheels, physically score or chip them so they cannot be remounted, and follow local waste rules for disposal. Some manufacturers accept old wheels for recycling; check supplier options during procurement to reduce disposal headaches.
Key takeaway: make inspection, mounting, and simple recordkeeping a non negotiable step. The small time invested prevents the big failures that stop jobs and expose the company to safety and compliance risk.
Compare cost, life, and productivity to choose the best value
Unit price lies; cost per job tells the truth. Buying grinding wheels on sticker price alone guarantees higher operating cost when crews change wheels often, spend time dressing or struggling with loading, or rework parts because the finish is wrong.
Calculate two simple metrics before you buy: cost per part and cost per productive hour. Those two numbers capture the economics buyers actually pay for: consumable spend, operator time, and downtime for changeovers.
How to build the quick comparison
Measure three inputs from a field trial or manufacturer data: wheel price, wheel life (in hours or parts), and average parts removed per hour or cut time per feature. Add a conservative estimate for changeover and scrap when a wheel underperforms. This is not theoretical—run 5 representative cuts or grinds and average them.
| Metric | Economy wheel | Premium wheel |
|---|---|---|
| Unit price | $10 | $18 |
| Life (hours) | 2 | 5 |
| Parts per hour (typical) | 4 | 7 |
| Parts per wheel | 8 | 35 |
| Cost per part (wheel only) | $1.25 | $0.51 |
Concrete example: a foreman compared a $10 economy disc and a $18 premium ceramic disc on a recurring weld cleanup task. The economy disc made 4 parts per hour and lasted 2 hours (8 parts total); the premium made 7 parts per hour and lasted 5 hours (35 parts). Even before factoring reduced rework and faster cycle time, the premium wheel delivered a lower cost per part and fewer changeovers for the crew.
Practical tradeoff to accept: premium abrasive often lowers net cost but can be too aggressive for thin or heat-sensitive work. If you swap to a high‑performance grain across your fleet without operator retraining, you can increase scrap. Buy premium where throughput, rework, or downtime dominate cost; keep cheaper wheels for occasional touch-up or noncritical tasks.
- Evaluation checklist: run a 1 day trial with measured parts produced; record wheel life and any dressing events; note operator technique differences.
- Include hidden costs: changeover time, extra PPE or guards, scrap rate, and shipping/lead time for replacements from your supplier.
- Procurement tip: request trial packs and small runs from potential suppliers and compare landed cost, not just list price. Leverage Hubzone Depot abrasives to consolidate trials and document HUBZone sourcing.
A common mistake is treating wheels as interchangeable. In practice, the right wheel reduces cycle time, reduces operator fatigue from repeated clamping and changeovers, and improves predictable throughput. Manufacturers marketing life claims are a starting point—validate with your material mix and tooling setup.
cost per part from suppliers before awarding a standard SKU. If a supplier cannot support a short paid trial or provide realistic life data on your materials, do not standardize them.Takeaway: run short, measured trials and compare cost per part and changeover impact—not unit price—then buy the wheel that lowers total operating cost for the specific jobs your crews actually run.
Procurement checklist and integrating supplier diversity and HUBZone sourcing
Direct rule: put the technical spec and the supplier diversity requirement on the same purchase order line. If the PO only says grinding wheels you will get a mix of incompatible products, missed HUBZone credit, and extra administrative work chasing certificates.
Stepwise procurement checklist
- Define the part-level spec: abrasive type (aluminum oxide, zirconia, ceramic, silicon carbide), wheel form (flap disc, cutting disc, bench wheel, cup wheel, diamond wheel), grit range, bond type (vitrified, resinoid, reinforced resin), diameter, thickness, arbor/bore, maximum RPM, and manufacturer part number. Add one approved alternate.
- Require documentation up front: supplier must supply a Certificate of Conformance, MSDS, reinforcement/FR marking, and proof of HUBZone or small business status. If they claim ISO 9001, ask for scope and last audit date.
- Field trial clause: mandate a paid trial pack and measurable acceptance criteria — parts per wheel, cycle time, loading frequency, and acceptable scrap rate. Approvals are conditional on signed trial results from the foreman or maintenance lead.
- Logistics & packaging: state lead time, MOQ, return policy for defective lots, and whether supplier offers bin/consignment stock or scheduled replenishment. Call out palletization and labeling requirements if you route through a central store.
- Price & landed cost: quote unit price, freight terms, and small parcel auditing rules. Require the supplier to itemize freight to let procurement compare total landed cost, not sticker price.
- Performance & remedies: include SLA items for on-time delivery, replacement of nonconforming goods, and a short-term price lock for certified HUBZone suppliers during your first three months.
- Spend & compliance tracking: mandate that invoices include the supplier DUNS, HUBZone certification reference, and a PO field to tag HUBZone spend for your diversity reporting.
- Contingency planning: identify a secondary approved supplier (can be non-HUBZone) for emergency shipments and specify minimum emergency stock levels on site to avoid last-minute high-cost freight.
Tradeoff to accept: prioritizing HUBZone and diverse suppliers accomplishes regulatory and contracting goals but often narrows short-term supplier choices and can increase lead times. Compensate with trial packs, consignment bins, and a clear acceptance test so quality and availability do not suffer.
Concrete example: a mid‑size contractor standardized on a HUBZone supplier for flap discs and bench wheels. They required a two‑week paid trial and a consignment bin that the vendor replenished weekly. Result: the contractor documented HUBZone spend, avoided emergency overnight freight, and reduced procurement touchpoints — unit cost rose modestly but total landed cost fell once freight and admin time were counted.
Practical judgement: insist on field-verified life data before you award a recurring contract. Buyers who let cheap unit price drive awards see higher changeover costs, scrap, and safety exceptions. If a HUBZone vendor cannot provide short trials or traceable COAs, treat them as unproven and require a probationary purchase batch.
Use Hubzone Depot supplier diversity to consolidate sourcing and document HUBZone spend, and run small paid trials organized through a single procurement contact to reduce administrative friction.
Final takeaway: write the technical spec and the diversity requirement into the PO, require a short paid trial with measurable acceptance criteria, and use consignment or dual sourcing to balance HUBZone goals with site reliability.
Common mistakes, troubleshooting, and real contractor examples
Straight fact: most grinding wheel failures trace to human decisions, not mysterious defects. Selecting grinding wheels by price, ignoring machine fit, or skipping an on site compatibility check creates the failures crews actually see: excessive heat, vibration, loading, and safety incidents.
Troubleshooting matrix
| Symptom | Most likely root cause | Immediate action | Permanent corrective step |
|---|---|---|---|
| Wheel glazing and slow cut | Wrong bond or grit for material; low operator pressure or clogged grain | Stop, change to a coarser grit or anti loading disc; clean workpiece | Specify open structured grain or zirconia/alumina with appropriate bond; train on technique |
| Severe vibration or chatter | Poor bore fit, wrong flange, runout on wheel or spindle | Remove wheel, measure bore and runout, swap to spare with correct arbor | Standardize flanges, use correctly bored wheels, check spindle bearings |
| Rapid flank wear or wheel disintegration | Over speed, incompatible wheel for tool class, or impact damage | Stop use immediately, quarantine wheel, use wheel rated for tool RPM | Match wheel max RPM to tool, require reinforced/resinoid construction for handheld work |
| Loading and clogging on nonferrous or painted surfaces | Incorrect abrasive chemistry or bond; resin bond glazing | Switch to silicon carbide or anti loading bonded discs; reduce pressure | Buy non loading formulations or use polishing discs; schedule dressing or cleaning |
| Burn marks or heat discoloration on stainless or thin stock | Too aggressive grit or wrong abrasive type generating heat | Swap to ceramic or finer grit, reduce pressure and use intermittent contact | Specify ceramic alumina or Cubitron II type products for stainless and train on low pressure technique |
Practical tradeoff: buying a high performance abrasive usually improves cycle time and life, but it also magnifies poor technique. Faster cutting wheels remove metal quickly which exposes operator errors like excessive pressure or poor fixturing. If you upgrade wheels, budget one short training session and a measured field trial so crews adjust pressure and feed rates.
Real contractor example: A structural crew was burning paint and gouging thin channel when they adopted a premium ceramic cutting disc without operator retraining. After swapping to a finer grit ceramic disc for that task and coaching operators to use lighter passes, paint damage and scrap dropped sharply and the crew kept the premium discs for heavy stock work.
Second example: A road crew used a diamond cup wheel designed for hard aggregate on crumbly concrete, producing chatter and spalling. They replaced the wheel with a segmented cup designed for softer matrix and adjusted travel speed; the spalling stopped and productivity rose because the correct bond avoided overloading the diamond layer.
- Field triage steps: Stop the job and make the tool safe before inspecting the wheel
- Check mounting: verify bore, flange seating, and adapter correctness in that order
- Swap and compare: run the same cut with a known good wheel to isolate tool versus wheel issues
- Document: photograph the wheel stamp and damage, record operator and machine for traceability
Final takeaway: stop treating grinding wheels as interchangeable. When a symptom appears, use the matrix above to isolate immediate risk, then fix the procurement or training gap that allowed the mismatch. The quickest, cheapest fix is often a short field trial plus an operator coaching session, not another box of the same cheap discs.
{
“@context”: “https://schema.org”,
“@type”: “BlogPosting”,
“mainEntityOfPage”: {
“@type”: “WebPage”,
“@id”: “https://shop.hubzonedepot.com/choosing-right-grinding-wheels-guide”
},
“headline”: “How to Choose the Best Grinding Wheels: Buyer’s Guide”,
“description”: “Discover expert tips on selecting the right grinding wheels for your projects. Enhance efficiency and performance with our contractor’s guide.”,
“image”: [
{
“@type”: “ImageObject”,
“url”: “https://example.com/path/to/image.jpg”,
“caption”: “Photo realistic image of five types of grinding wheels laid out on a workbench.”
}
],
“author”: {
“@type”: “Person”,
“name”: “Elisa”
},
“publisher”: {
“@type”: “Organization”,
“name”: “Hubzone Depot Shop”,
“logo”: {
“@type”: “ImageObject”,
“url”: “https://shop.hubzonedepot.com/logo.jpg”
}
},
“datePublished”: “[publish date]”,
“dateModified”: “[modify date]”,
“@id”:”https://shop.hubzonedepot.com/choosing-right-grinding-wheels-guide#blogpost”
}
article blockquote,article ol li,article p,article ul li{font-family:inherit;font-size:18px}.featuredimage{height:300px;overflow:hidden;position:relative;margin-top:20px;margin-bottom:20px}.featuredimage img{width:100%;height:100%;top:50%;left:50%;object-fit:cover;position:absolute;transform:translate(-50%,-50%)}article p{line-height:30px}article ol li,article ul li{line-height:30px;margin-bottom:15px}article blockquote{border-left:4px solid #ccc;font-style:italic;background-color:#f8f9fa;padding:20px;border-radius:5px;margin:15px 10px}article div.info-box{background-color:#fff9db;padding:20px;border-radius:5px;margin:15px 0;border:1px solid #efe496}article table{margin:15px 0;padding:10px;border:1px solid #ccc}article div.info-box p{margin-bottom:0;margin-top:0}article span.highlight{background-color:#f8f9fb;padding:2px 5px;border-radius:5px}article div.info-box span.highlight{background:0 0!important;padding:0;border-radius:0}article img{max-width:100%;margin:20px 0}